Knit, whittle, glue, wrap, paint or sculpt to craft a homemade gift using found materials and things you already have on hand! There's a $10 limit if you need to supplement your craft supplies. Amy Sedaris will be back on December 3 to pick a winner! The deadline to enter is Tuesday, November 30, at 5:00 pm. Winners will receive an autographed copy of Amy Sedaris's new book Simple Times: Crafts for Poor People and a Leonard Lopate Show 25th anniversary tee-shirt!
My craft
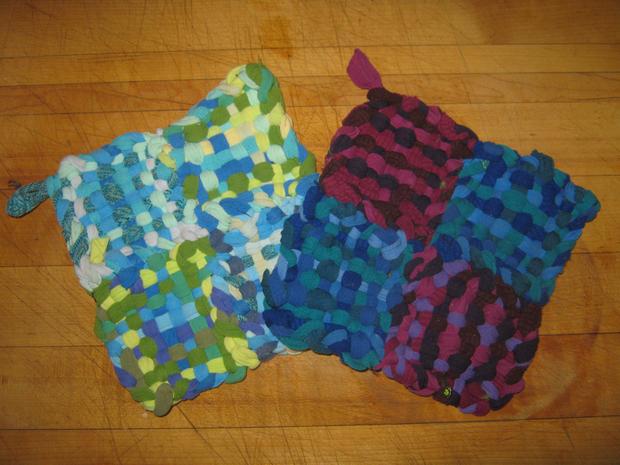


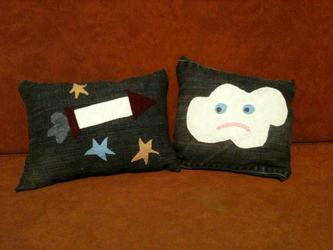
I made pillows out of pants that no longer fit and felt I had lying around my apartment.
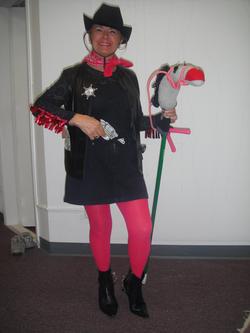
I can't afford a REAL horse so in keeping with my inner crafting child I made a fabulous STICK HORSE. It's great for that quick trip to the local grocery store on City Island!
I used a handle from a dust mop for its body; a gray and black hiking sock (from my husband's sock drawer), miraculously shaped into a horse head by stuffing it with TP; button eyes from my button collection with green felt eyebrows and a big red felt mouth (did I mention that this is a KISSING horse?) A mane of black and white yarn cleverly looped and sewn by hand with a pink jump rope as the final touch for his bridle. Voila! Now I can keep up with my grandson! Total cost...$00. priceless!
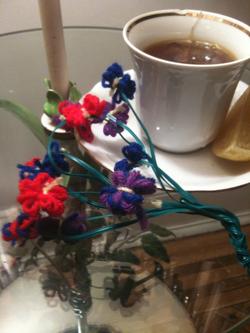
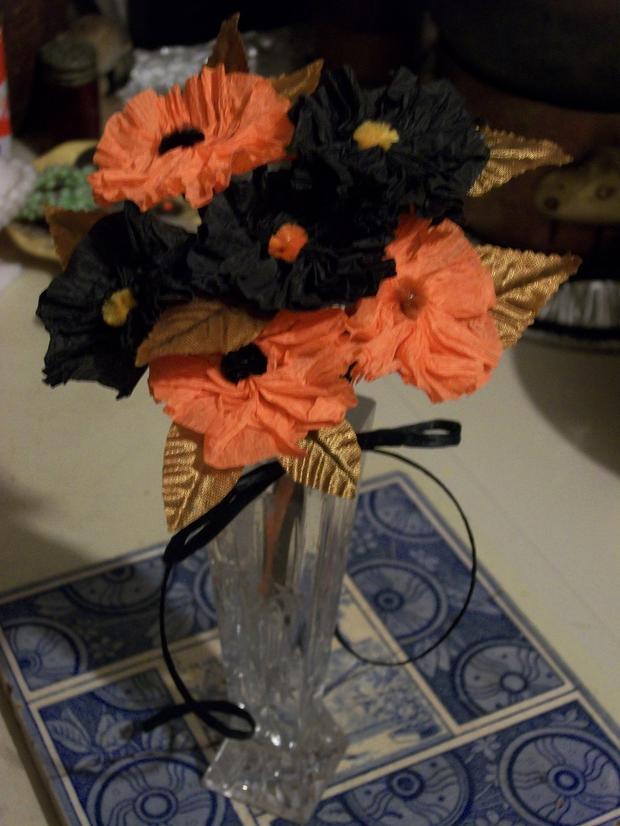
Twist-tie Bouquet
Materials: Twist Ties and Colored Yarn.
This was a craft that was given to Amy Sedaris while she was in Durham, N.C. on the book tour. The gentleman said his grandmother made them. Amy asked that I submit this under my name, so that she could pick it as the winner.

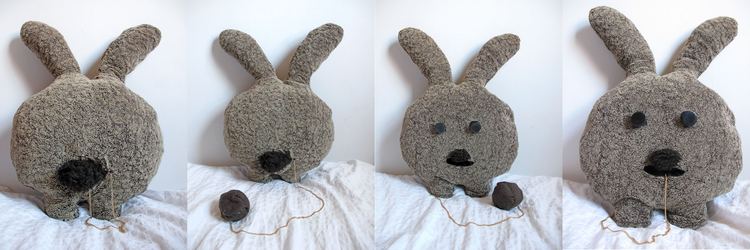
Poop-eating rabbit pillow
Concept: My two pet rabbits like to eat their own poop (particularly in the early morning when they produce what is called cecotropes: soft, glossy pieces of poop). Inspired by this unusually disgusting activity, I decided make a rabbit-shaped pillow with a piece of poop attached to it on a gold chain. The poop can be pulled out of the rabbit's butt and placed into its mouth.
Material: I used up some left-over fabric from another project and two extra buttons that came with a coat I once bought. The stuffing is from an old pillow that was ready for the garbage. The only things I had to buy were the "gold" chain and a tiny piece of fake fur ($4 total).
Bonus: Since I had some fake fur left over from the tail, I decided to give the rabbit a mustache, which makes him look a little bit like Hitler.
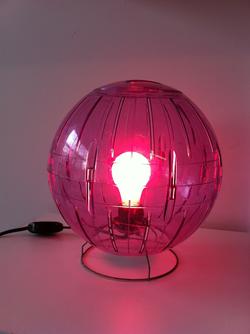
When my neighbor's gerbil, Mr. Spock, suddenly passed away, and in his sorrow he discarded the poor creature's toy exercise ball, I was moved to create a monument to the animal. Also, I seized the opportunity to provide myself with some sorely needed ambient lighting in my home. Using the plastic ball, some lamp parts, a metal base, cable ties, and a pink lightbulb, I designed a sleek, utopian, Mid-Century Modern style lamp right out of the 1964 World's Fair! I call it: "The Gerbilsphere."
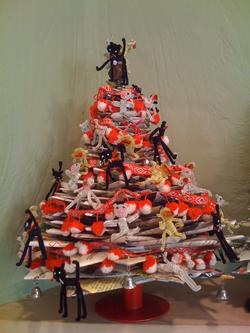
This tree was made from magazines cut into squares and folded into stars. The stars are then stacked onto a wine cork with a wooden skewer running through the center, and stuck into a candle holder. I sprayed the tree with varnish and decorated it with pipecleaner animals (dog, cat, pig and monkey) that my mother found at a tag sale for ten cents and with red and white pom pom fringe I bought at a church bazaar for $2.50.
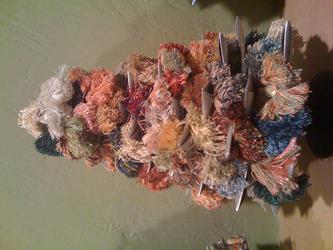
This is my origami star and fringe tassle tree made from Japanese grocery store flyers (I get free) folded into stars, spray painted, and decorated with rolled up fringe from a sample book I've had from my Girl Scout troop leader days.
The stars ranged in size from 9" to 1" in diameter and the tassles are rolled up fringe samples glued to stay together. I then took a wine cork and inserted a wooden skewer through the center. I stacked the stars and glued them so that the wouldn't shift around, and then stuck the cork into an old candle holder I kept after that the glass cylinder for it broke. I spray painted the whole tree and stuck in the tassles.
I was looking to recycle and repurpose stuff I had around the house. I hope you enjoy it!
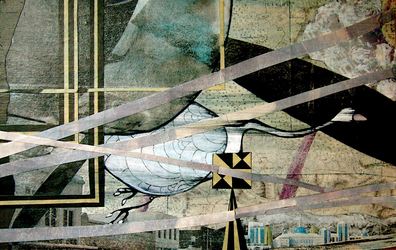
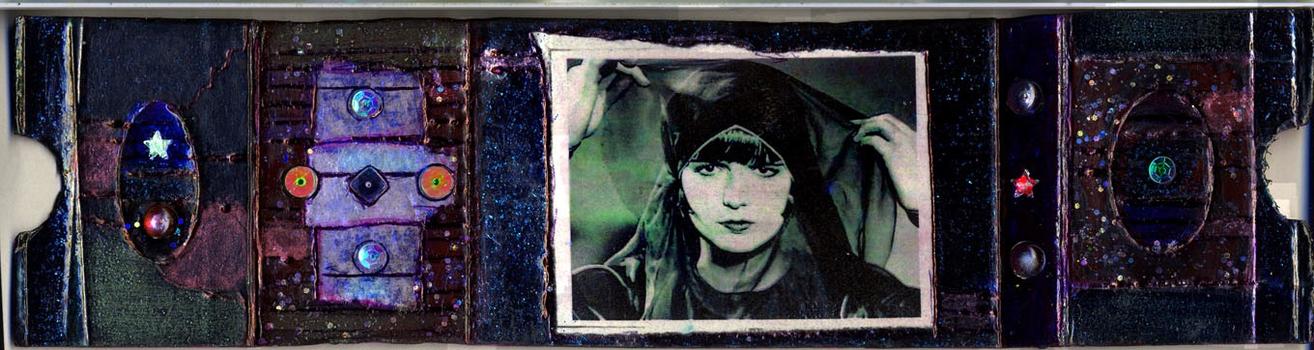
I started making collages a few years ago, craving a hands-on, non-toxic, and gift-able hobby that I could practice in my Brooklyn kitchen. I use catalogs, magazines, and newspapers (none of which I pay for), and prefer to work on scraps of material I find on the street... the best are the particle board backs to cheap shelves, since they are very flat, lightweight, yet still cut with an Xacto knife. All I've ever bought is Mod Podge, though sometimes I do incorporate some nail polish.
I just try to make something the recipient will really like, sometimes off pre-requested direction, sometimes just on a hunch. This particular one I made really early on for my dad, who loves "flight."
So far I've made 59!
They're all here:
http://www.flickr.com/photos/jessato/sets/72157605489283766/
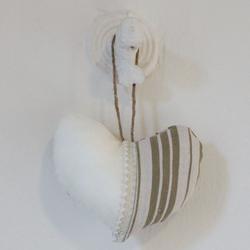
Eco friendly heart ornament:
I used for this project a piece of linen, a piece of vintage ticking fabric, a piece of vintage lace, and polyester fiber for the stuffing. Any vintage fabric could do it, the idea is to recycle old fabrics.
I first sewed the fabrics and lace together. Then I cut two hearts that I assembled together by sewing them living a small hole for stuffing.
When this is done, I stuff them with the polyester fiber, ET VOILA! An eco friendly heart ornament gift!
http://www.etsy.com/listing/61446142/vintage-ticking-fabric-heart-ornament

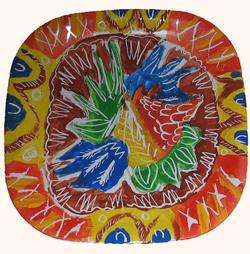
Paper Mache Bowl. Done with paper, water, and every paint tube and glitter medium I own.

Lobster Claw Sailboat
Made from the big claw of a lobster for the main vessel, an index card for the sail and half of a clothes-pin as the stand. Colored with marker, glued with hot glue. No materials purchase, made with all found stuff at home.
Made by 12 year old Matthew Bevan of Massachusetts, submitted by his older sister Caroline.
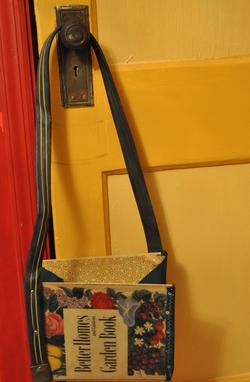
BookBag made from my mom's Better Home and Garden Book, ditched the interior pages, fastened a flattened 'soaker" hose as strap, screwed on sides made of canvas and Wa-LAAA!!!! a "BookBag"!!!! the book was going to the curbside, hose was already there-, nothing but about an hour and half labor- made for my friend that likes cheap crafty stuff- clayton orehek
http://batemandesign.com/Page-Kid'sPage.html
OK, I'm pushing it a bit, but let me explain.
The figures in this on-line kid's game were electronically cut and pasted from a bunch of watercolors I happened to have hanging around my apt. (unsold)
Each of the 70 images can be moved around and rearranged in any wacky way desired. Best of all it's free for anyone and cost me nothing (except for the $500+ web design program, but that shouldn't count).
Enjoy, I hope.
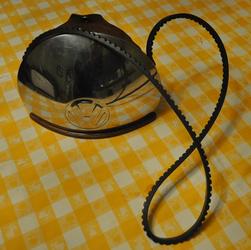
This bag was made from a VW hubcap from my 1964 Bug. The back is leather from an old coat. The inside is lined with the pocket part of the thrift store shirt I was wearing--smelly sweat and all. The fan belt was found on the side of the road. I glued a piece of the scrap wood to the bottom. My only true investment was in the stainless steel screws to attach the fan belt to the hubcap, the snap to provide a closure, and the quarter I glued inside the bottom for good luck. Total investment: $1.05
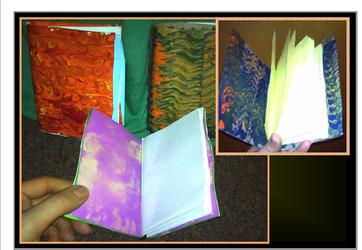
You can make REALLY cheap recycled journals. The marbling effect makes them look artsy and is sure to inspire channel angst or inspire your favorite poet. The cover is made of a cereal box, or any similar box. To make a thicker binding, I have also used a toilet paper or paper towel roll. School glue holds it together and paint finishes it off. The best part is that you don't need to measure anything and the box naturally folds to create pockets for the paper filling. Oh yeah, you also need scrap paper with printing on just one side (easy to obtain from an office or copy center) and some yarn or a rubber band to hold the pages together. Another plus is that these can actually be made so the fill paper is removable so they can be refilled again and again.
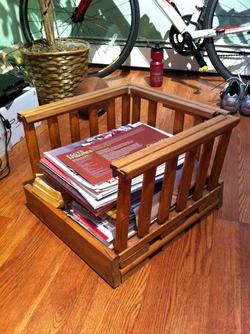
This is a magazine holder I made for my mom using the wood from a futon that my parents were throwing away. The three sides were made mainly using parts of the armrests, while the rest consists of the planks of wood that held the couch. To keep it together, I used a few nails and wood glue that I had in the house already. I also used shellac.
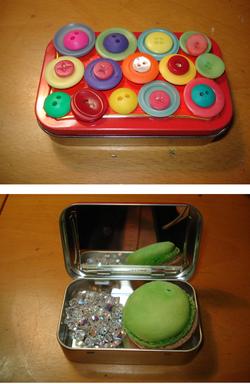
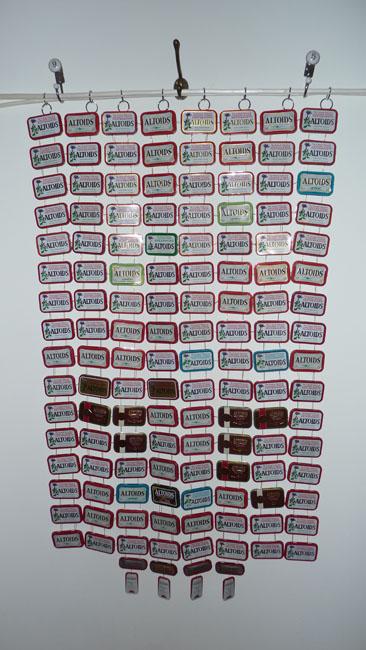
ALTOIDS COMPACT MIRROR:
One Altoids box--$2.00
A rectangular mirror--$0.50
Buttons--$0
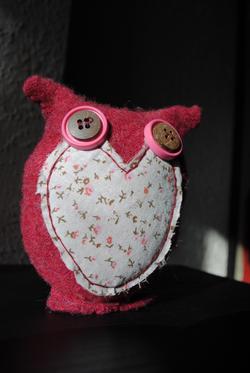
To make this owl, I used a felted wool sweater for the body... "felted" is fancy talk for accidentally putting a wool sweater in the washing machine using hot water.
I also used fabric from another former member of my wardrobe for his belly and his eyes are buttons from my button drawer.
I even had a bag of poly-fil leftover from another craft project so I spent $0 making this little guy.
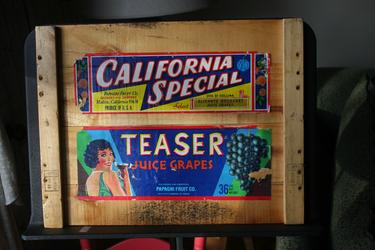
A neighbor had about 15 fruit crates on the curb headed for the garbage. I took one look at them and knew exactly what I could do with them. They where NOT vintage crates ,Because the end panels where made of press board. I soaked the labels off with soapy water and dried them in paper towels, Then when the where dried I ironed them and put them under a few heavy box's. next I completely took the crates apart ,cut them up and reassembled with wood glue. Last step was gluing the labels and 2 coats of poly U. I still have enough material to make about 4 more. cost zero ... I used materials I already had. My inspiration came from the Whitney Museums Cafeteria that had a collection of fruit crate boxs back in 1974. Ray Medio
Leave a Comment
Email addresses are required but never displayed.