Knit, whittle, glue, wrap, paint or sculpt to craft a homemade gift using found materials and things you already have on hand! There's a $10 limit if you need to supplement your craft supplies. Amy Sedaris will be back on December 3 to pick a winner! The deadline to enter is Tuesday, November 30, at 5:00 pm. Winners will receive an autographed copy of Amy Sedaris's new book Simple Times: Crafts for Poor People and a Leonard Lopate Show 25th anniversary tee-shirt!
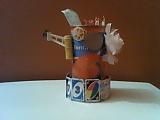
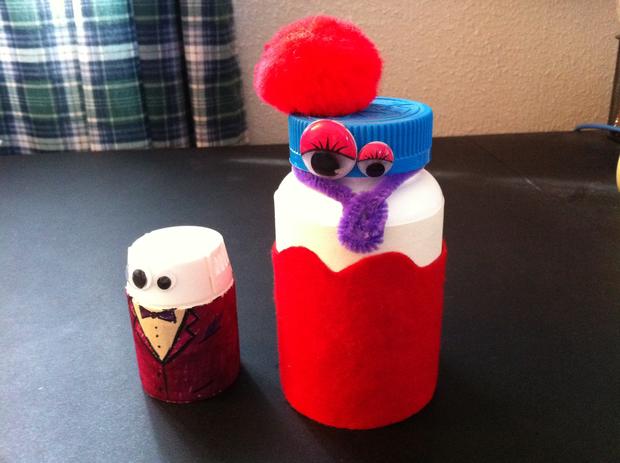
My craft
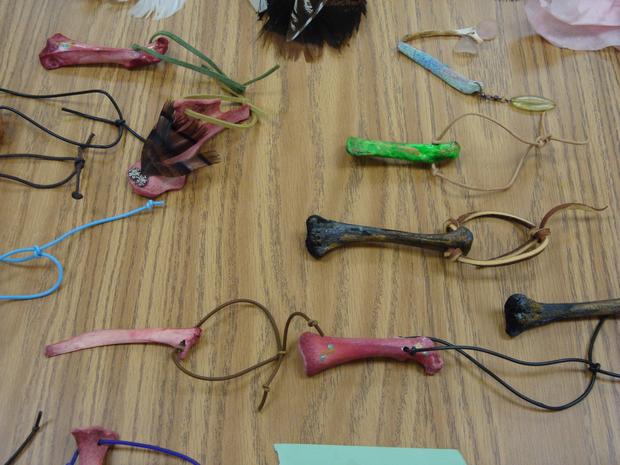


This piece I found in a dumpster. With a few wood screws and some wood glue, I stabilized it then a little sanding, some water based blue stain and a few layers of glossy wet top coat. view more work at http://www.coroflot.com/m8qlaff
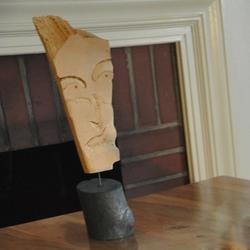
This piece I carved with a Dremel tool out of a piece of Pine reclaimed from a discarded packing crate. The base is a piece of White Oak from the park across the street colored with a water based stain. Total cost...well about an hour and a half, not counting the walk in the park, which I would do anyway. View more work at http://www.coroflot.com/m8qlaff

Hand holding Creamsicle glove creamsicle wrapper styrafome and glue
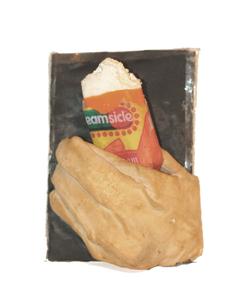
Hand holding Creamsicle glove creamsicle wrapper styrafome and glue
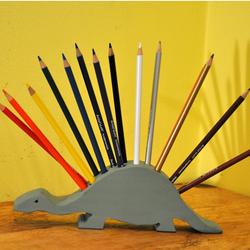
Cut from a found 2"x4" and painted with some leftover green paint this Dinosaur with the Pencils cost approximately $4.44.
View more work at http://www.coroflot.com/m8qlaff
In 1971, I found these rolls of self adhesive lip-shaped stickers of different colors in a dumpster. These different colored lips were used to identify various shades of 'frosty'lipstick sold in the stores.
They were perfectly shaped and I didn't know what to do with them, but thought it would be a waste to just sit in a landfill. I took them home and I put them in a shoebox to use at a later date.
That later date was in 2008, when I met this girl by accident and wanted to get her attention.
Since it was around Christmas, all I could think about is how I would like one kiss from her under the mistletoe. She was always so busy, so I knew I had to find a way to get her attention.
I opened up the shoebox with the rolls of lip-shaped stickers. I knew her age from our past conversation and wanted the project to revolve around that.
I picked out exactly 33 lips from the different colors and start arranging them in a shape of a Christmas tree on a piece of paper. Because the stickers were so old, I just needed a little bit of glue from my glue stick and viola. A perfectly shaped-tree for the woman I knew I was in love with.
I dropped the tree in her mailbox and it wasn't long that we finally went on a date and I got my first kiss from her.
So to celebrate our union, I'm made another one to donate to this year's 13th Annual "Postcards from the Edge," a benefit for Visual AIDS. This will be shown along with 1500 other original postcard-sized artworks by artists at CRG Gallery in December 2010. All postcards are to be sold with the proceeds going to support the work of Visual AIDS.

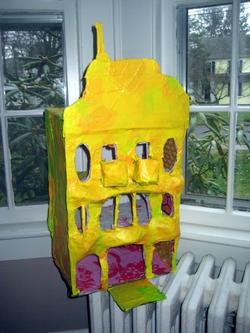
dollhouse a la gaudi...
way cheaper than a trip to barcelona...and more fun and longer lasting and you can brag about recycling. all you need is a cardboard box, newspaper, glue, tape, a picture of casa batllo, and fabric scraps and/or paint and/or tissue paper ( I used all three)...
enjoy!
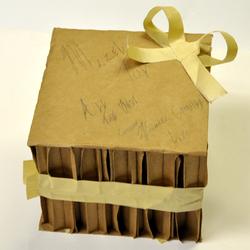
A corrugated cardboard box made for a Bar Mitzvah. On it were written some pearls of ancient wisdom like “Read Books” and “Make Art” but the up shot is the boy never opened it to get at the real gifts inside perceiving only the sculptural and structural qualities of the box itself. I got the thank you card and I read “Thank you for the cool paper box.” I thought about this for a moment called the mom and said “Please tell me that he opened the box and actually got the stuff that was inside?” “It opens?” came the shock reply. What fun. View more work at http://www.coroflot.com/m8qlaff
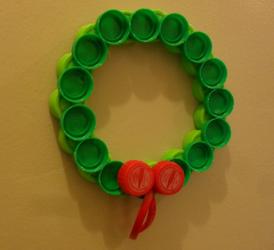
Plastic Bottle Cap Wreath.
Green and red bottle caps glued in a circle to create a recycled christmas decoration.
This is a small wreath great for a housewarming gift. I scavenged these caps from various sources and my husband has a bottled green tea habbit. Easy project!

My bookmark was inspired by a craft project my son did at a local museum. At the museum, he made a mosaic by sandwiching old stamps, squares of cut up greeting cards and sequins between two pieces of cover film. I thought this had great potential.
First, I photocopied my collage images. After cutting them out, I arranged them on a sheet of cover film. Then I added sequins and a sprinkling of glitter. I covered it with another sheet of cover film, trimmed it and laminated it. Added the cord and it's done.
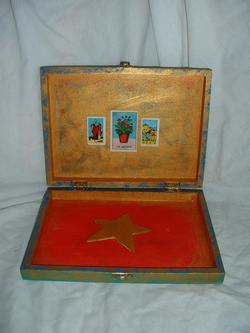
Personal portable sacred space -- small wooden box with multiple layers of paint, a Loteria card, some mini Tarot cards and a painted wooden star in the base.
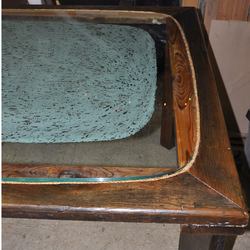
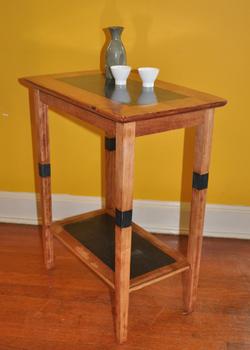
Glass surface found by the side of the road. Redwood wood from a discarded picnic table, a little bit of leftover green paint and some bits of rope from the local hardware store. Total cost about $4.97 for a rustic dinning table measuring 48"x48". Love it! view more work at http://www.coroflot.com/m8qlaff
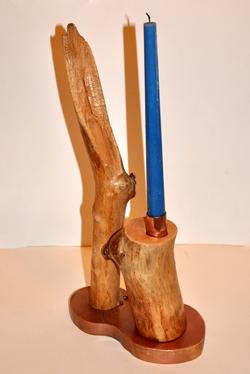
White Oak limbs reclaimed from the park across the street. Pine base cut from a discarded packing crate. Copper paint from the clearance bin at Micheal'S and a copper plumbing coupling from the local hardware store. Total cost $1.48 and I didn't use all the paint in one shot. This one went to my Grandmother in California with a hand dipped candle made by my daughter. Tell me she didn't love it. I am very interested in stuff people throw away view other work at http://www.coroflot.com/m8qlaff
Thanks
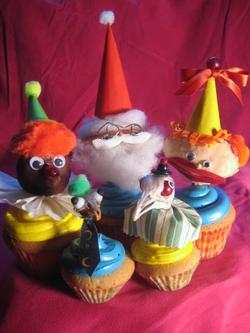
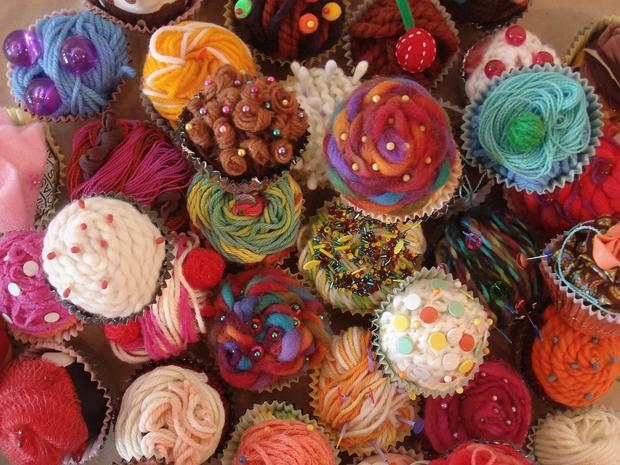
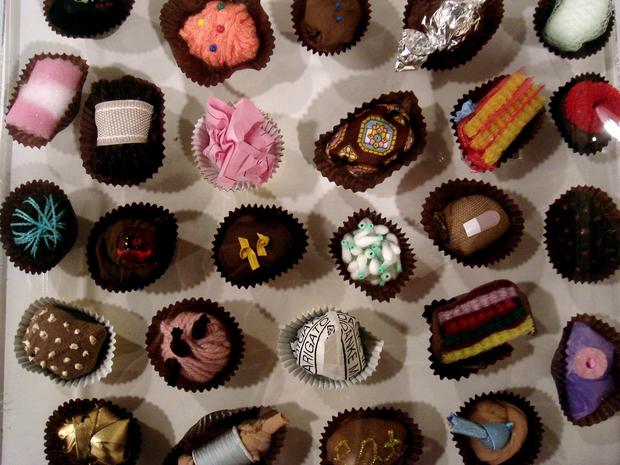
Taxidermy and Found Object Cupcake Toppers
Simple explanation- I love them both and yet, until now, never brought them together!
Ingredients:
crab shells, shrunken deer nut, mouse skull, bird skull, origami paper, tissue paper, fabric scraps, buttons, beads, pink, black, and white pepper corns, wiggly eyes, puffy balls, paper clip, pillow stuffing, coffee filter, ribbon, zipper, flattened shipping peanut, chop sticks, toothpicks, elmer's glue, hot glue.
Gift For My Niece
Candy Mirror
I bought a mirror at the dollar store...(for $2.99!) and glue gunned hard candy that I never eat (I stick with chocolate) to the surface, then dipped it in polymer plastic coating. The chemicals in the candy preserve it perfectly.

Gift For My Niece
Candy Mirror
I bought a mirror at the dollar store...(for $2.99!) and glue gunned hard candy that I never eat (I stick with chocolate) to the surface, then dipped it in polymer plastic coating. The chemicals in the candy preserve it perfectly.
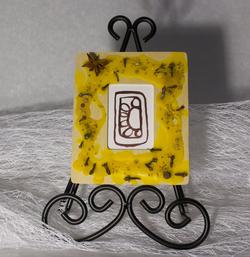
Holiday Spice Frame
Material:
wood frame 5x6", old candle, wax crayon, spices (anis, pepper, clove, anis seed, whole all spice, brown paint and paper.
I melted the wax, added a yellow crayon; once melted I poured it over the frame and added spices immediately, then I spread more cloves over the frame, and poured more hot wax over them.
At the end I painted on the paper and attached it to the back. It smells really good.
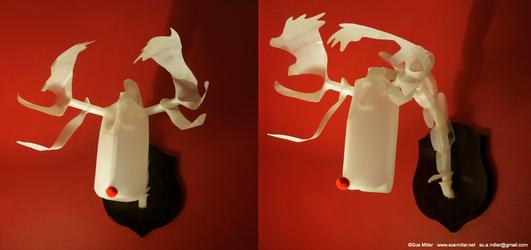
Mounted deer head made from plastic water/milk jugs, wood, glue gun glue.
Hi,
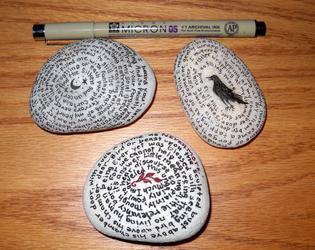
My name is Kathy Libraty and I live in Prospect Park South in Brooklyn. My project is called ROCK WORDS and it is very simple. Find some smooth rocks that you can hold in your palm, preferably in light tones. I found my rocks on the Long Island Sound at a beach on the North Fork. Get an indelible fine point marker--mine cost about $1.79 at the art supply store. (Each additional color that you choose to use will be $1.79--so you can use up to 5 colors to stay under $10).
Copy a poem or an interesting quote or make up your own. Our first rocks were inspired by rock song lyrics. For this project (see photo) I used verses from The Raven by Edgar A. Poe. Write them in small print on the rock. I chose to use a spiral circular line, but any line plan will work; you can experiment with pencil first.
I drew a little design in the middle too, but that is not necessary. You don't have to be an artist, just a neat writer.
Credit also goes to my daughter, Elisa, who conceived of this idea while we were vacationing in Greenport, Long Island this past summer. Everyone that has received one of our rocks has been totally delighted!
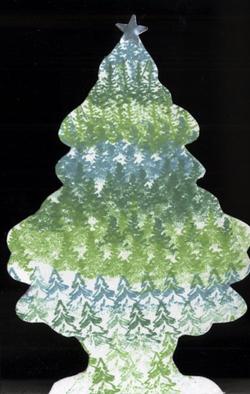
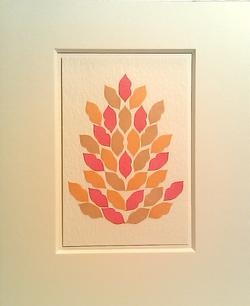
CRAFT PROJECT - Limited edition Holiday Tree Card
I found this tree-shaped car air freshner on the street. I wasn't sure what I wanted to do with it, so I just hung it and let it stew.
Then one day my friend was getting rid of this paper that I really liked the texture of. He gave me the sheets and I took them home. I put it on the table and by chance, I accidently knocked down the tree air freshner that landed on the paper. And then something sparked in my head.
I went into my craft drawer and found some old tree shaped stamps that I had for awhile. It got me thinking about the deli down the street that had christmas trees for sale. All the trees were different, but had their own personality. And the light bulb finally flashed.
I cut down the paper to 4x6 sheets, traced the form from the car air freshner, cut out the form, and stamped each tree with a different combination of the tree rubber stamps that I had. I went to my local crafts store, bought a tri-color stamp pad for $6.50 and start stamping away. Luckily, I also had some sheets of those foil star stickers that school teachers use, and viola...a personalized christmas card for each of my friends.
Every tree has the same shape, but are slightly different and beautiful in their own way.
This is one sample of the one hundred cards I made. With a friend, I even laid out all 100 cards to make a forest of friends that you can see on my facebook page.
http://www.facebook.com/album.php?aid=364692&id=637585625&l=c4fe335458
And if you are curious how all 100 came out, with a scanner, we were able to do portraits shots of each tree that is in this photo gallery.
http://www.facebook.com/album.php?aid=365733&id=637585625&l=658d126851
So run-down of materials
- 1 used tree-shaped car air freshner
- Sheets of medium weight blotting paper cut down to 4x6
- scissors
- 3 tree rubber stamps
- Tri-color inkpad (main cost $6.50)
- gold/silver foil star stickers
- pen to sign card
It came down to less than a penny a card, but hours and hours of my time. Like a good conversation with a friend or family member.
Happy Holidays.
Leave a Comment
Email addresses are required but never displayed.