Knit, whittle, glue, wrap, paint or sculpt to craft a homemade gift using found materials and things you already have on hand! There's a $10 limit if you need to supplement your craft supplies. Amy Sedaris will be back on December 3 to pick a winner! The deadline to enter is Tuesday, November 30, at 5:00 pm. Winners will receive an autographed copy of Amy Sedaris's new book Simple Times: Crafts for Poor People and a Leonard Lopate Show 25th anniversary tee-shirt!
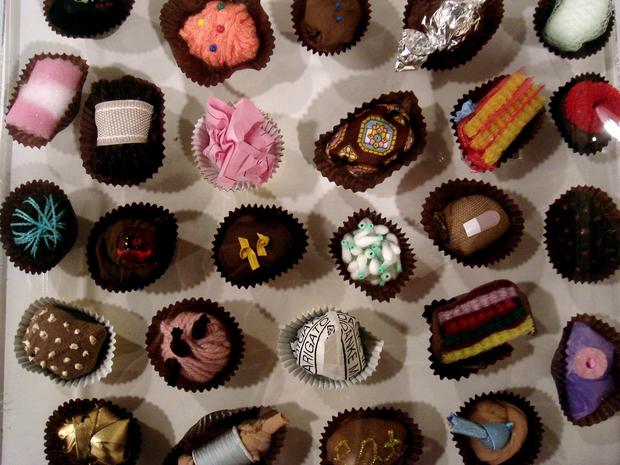
My craft
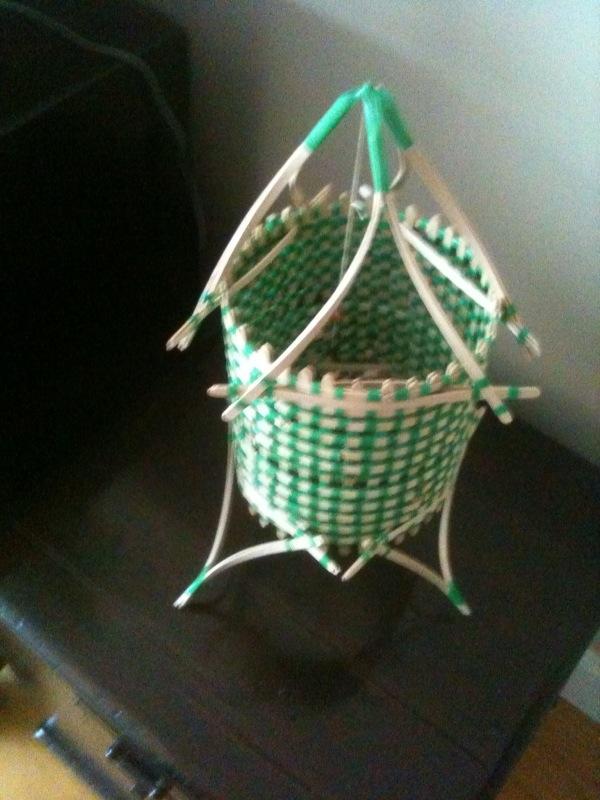
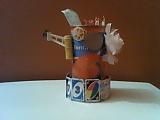


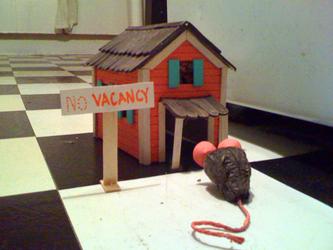
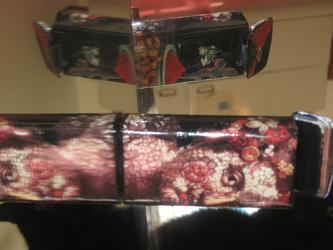
Bed and breakfast style mouse trap cosy.
Made with Popsicle sticks and stirrers pillaged from my local Starbucks, this decorative glue trap cover makes the chambers of death that I laid around my kitchen so much more inviting to the rodent freeloaders that have taken up residence in my home. It hasn't caught anything yet, but I'm quite confident that once they visit my mini bed and breakfast, they won't ever leave. The mouse, for illustrative purposes, is made from a tampon and acrylic paint... since I won't be using it at this point, I'd say that puts my materials budget in the less than a dollar range.

I love doing papier mache, but dealing with newspaper and paste can be such a hassle and mess. Fortunately, I discovered a type of paper that can be molded and dried into many shapes with out glue, and it can usually be found in any home: ordinary toilet paper! To make this lovely candy dish, i took a glass bowl in the shape that i desired, wet strips of toilet paper (in water, of course) and layered them onto the bowl until it was about 1/4 of an inch thick. After it dried, I simply slid it off the glass bowl. The result? A delicate, organic dish perfect for entertaining. My guests were so amazed at the objet d'art I created, they didn't want to disturb the homemade truffles I served in it! A simple, fun and striking craft for about 20 cents worth of toilet paper. Bon apetit!


I love doing papier mache, but dealing with newspaper and paste can be such a hassle and mess. Fortunately, I discovered a type of paper that can be molded and dried into many shapes with out glue, and it can usually be found in any home: ordinary toilet paper! To make this lovely candy dish, i took a glass bowl in the shape that i desired, wet strips of toilet paper (in water, of course) and layered them onto the bowl until it was about 1/4 of an inch thick. After it dried, I simply slid it off the glass bowl. The result? A delicate, organic dish perfect for entertaining. My guests were so amazed at the objet d'art I created, they didn't want to disturb the homemade truffles I served in it! A simple, fun and striking craft for about 20 cents worth of toilet paper. Bon apetit!
Got an old pillowcase and some thread? I did! I embroidered a bow and arrow across a pillow case so that when you lay on it you look like you've been shot with an arrow. Ouch!
Materials - any pillowcase(s) that you have, embroidery thread or any thread really, and a pencil. Trace or draw your design on the case and stitch away. Embroidery is a great way to spruce up linens, pillows, and clothes or customize gifts for friends!

My local athletic club was giving out complimentary stress balls one day, which I thought looked wonderfully minimalist - fist sized, polished black, with a discreet white logo. Being more the fashionista than the health enthusiast, I made it into a necklace. Arguably, the project cost nothing, since the ball was free and I had all the tools on hand from previous efforts. But to enumerate, I used: a huge beading needle ($1), fishing line ($4.00), a magic marker ($2?) [to overdye the logo], and a fine aluminum pipe (3 for $1.39) - well within the budget.
Putting the needle exactly through the center of the ball was the hardest part. I pushed the needle out with the aluminum pipe, then threaded the fishing line though the pipe - figuring the fishing line without the pipe would soon rip the stress ball. Tie around the neck with a simple knot to the desired length, and tuck the remainder into shirt collar.
This has gotten rave reviews from strangers. People ask if it's heavy, and then gasp with surprise when I squeeze it to demonstrate how light it is. - Valerie
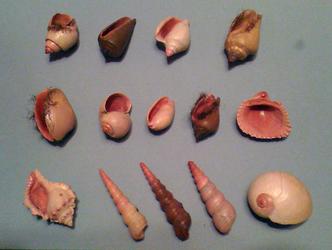
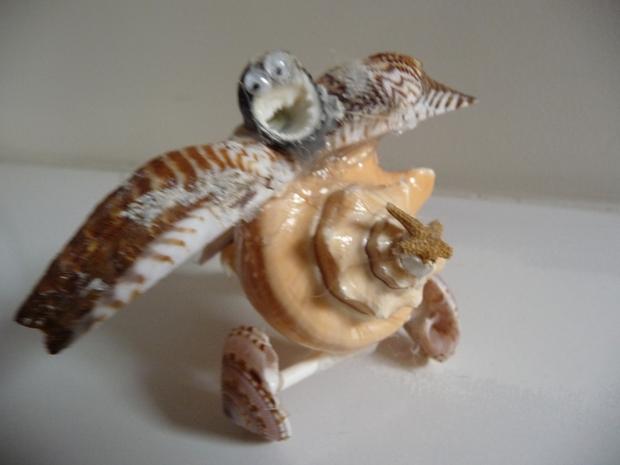
Whether displayed in a bowl or hung from the Christmas tree, painted seashells take the beauty of mother nature and do her one better. Materials: paint, hair, and shells.
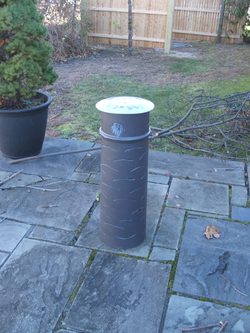
Made this yard light from a porch column that I recovered from a dumpster. The glass plate looks really good at night and protects the old Christmas lights that provide the illumination (they came from the basement inventory). Could not get a good picture in the dark.
Spent $8 on paint.
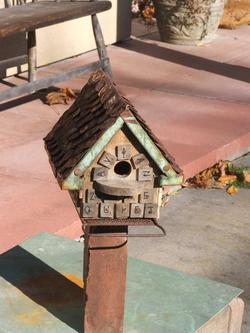
Made this birdhouse out of scrap wood, bottle caps and a not quite complete Scrabble set. Carried the Z in my pocket for a longtime, thinking how handy it would be if I found myself in a game. The floor is made from an old cheese grater. Didn't spend any money on this project.
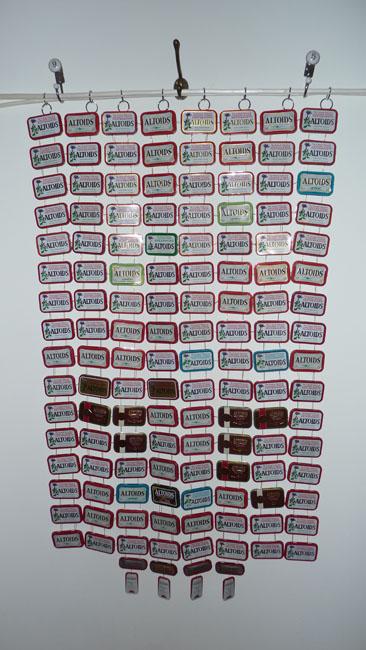
This is a photo of a decoupaged mint tin with the back and front showing in a mirror. It is 2" by 1" by 1/2". After accumulating many mint tins, I decided to decoupage them and I have given about 150 of them to friends who stash myriad small things inside. I really like to make them because they are tiny collages with stories to tell connecting the front and the back of the tin. Materials included were a mint tin, cut out pictures, Mod Podge, acrylic paint and varnish. These are all materials I have at home so there was no outstanding cost.
Elena Morrice 917-922-2719

This is a pair of Zuri slippers (Japanese flip-flops) made from two recycled tee shirts and one recycled pajama bottom, tape and rope. The entire cost was less than $1. They are very easy to make. Even children can make them :)
(Fully washable)
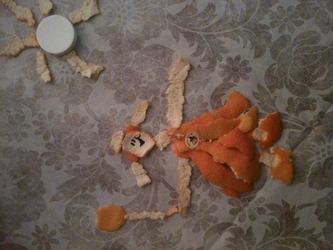
Clementine peel art...after an evening of binging on citrus I decided to make use of destructive behavior. For a gift, I would frame the pic in an old salvaged frame...
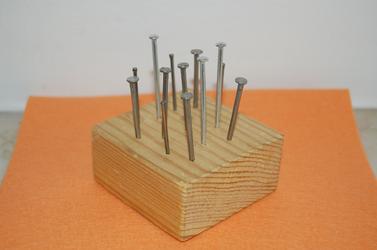
This is a replica of an actual Christmas gift I made for my father when I was about 8 years old. I called it a "Nail Cushion." Materials used: block of wood, handful of nails, hammer.
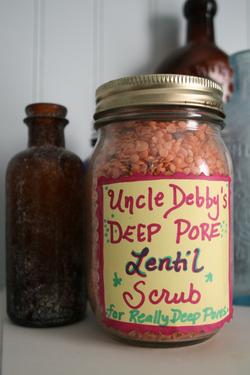
Uncle Debby knows what her family needs this holiday season. Take 1 jar of ancient lentils waiting patiently for the economic meltdown, add any number of relatives with an impressive array of giant pores, and voila, a gift that keeps on giving. No money spent, just beauty given.
-Eileen Hudziak, Milltown NJ.
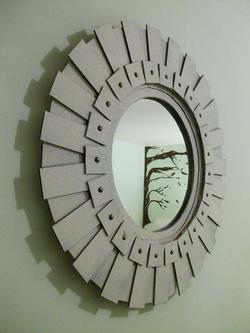
This mid century looking mirror was made using cardboard from old boxes, sliced into 78 pieces (3 different sizes). Then sprayed with spray paint. Put some tacks on it and an old mirror behind it and then you have a piece of art. If you don't have the supplies at home you can get them at the local hardware store for less than 10 bucks!
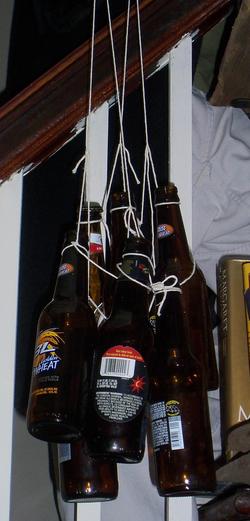
This BEER BOTTLE BABY MOBILE will clink out an enchanting lullaby over any sleeping infant's head. The cost is 5.95 for the same 12-pack used in the beer bottle xylophone and $.50 for twine.
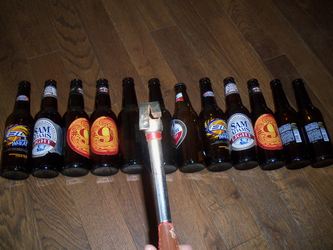
This is a beer bottle xylophone sure to delight the ears of children and adults. The total cost is 5.95 for the 12-pack and about 20 cents worth of glue.
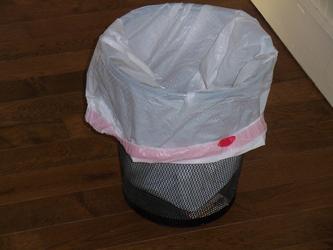
This is a little storage caddy in which you may stash craft gifts from friends, spoiled food and other refuse.
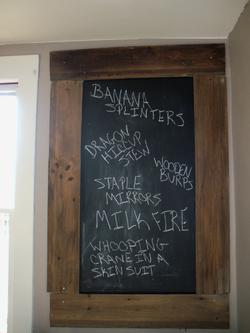
This is a $5 can of chalkboard paint framed by four pieces of barn wood that I found in my basement. It took less than 10 minutes to paint the wall and drill the wood into place.
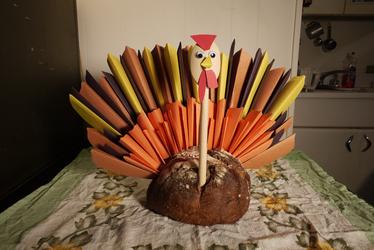
“Edible Thanksgiving Centerpiece”
Construction paper, wooden skewers, wooden spoon, wiggle eyes, loaf of bread for $6.00. Put together with a glue gun. It brightens up your holiday table, and then the following day can be sliced for your real turkey sandwich.

“Edible Thanksgiving Centerpiece”
Construction paper, wooden skewers, wooden spoon, wiggle eyes, loaf of bread for $6.00. Put together with a glue gun. It brightens up your holiday table, and then the following day can be sliced for your real turkey sandwich.
Comments [1]
There are humane traps sold thru PETA. This is mean, glad i'M NOT mickey, mini or stewart.
Leave a Comment
Email addresses are required but never displayed.